
Reading Electrical Schematics for Appliance Technicians: A Practical Field Guide

Terry Okafor
Master refrigeration tech and NATE-certified instructor who moonlights as the magazine's advice columnist. His 'Ask Big Terry' mailbag has been settling shop disputes and diagnosing mystery leaks since 2011.
Reading Electrical Schematics for Appliance Technicians: A Practical Field Guide
I've been watching newer techs diagnose appliances for fifteen years, and the single biggest dividing line between the ones who develop quickly and the ones who stay stuck is whether they read wiring diagrams. Not glance at them. Read them. Understand the schematic before touching the machine, trace the circuit that corresponds to the symptom, and confirm the reading with a meter. That's the whole skill set, and it takes maybe three months of deliberate practice to build.
This guide is the starting point. We'll cover the symbols, the diagram formats, how color coding works, and then walk through a real circuit trace. By the end, you should be able to look at an unfamiliar appliance schematic and know where to start measuring.
The Tech Sheet: Your First Stop Every Time
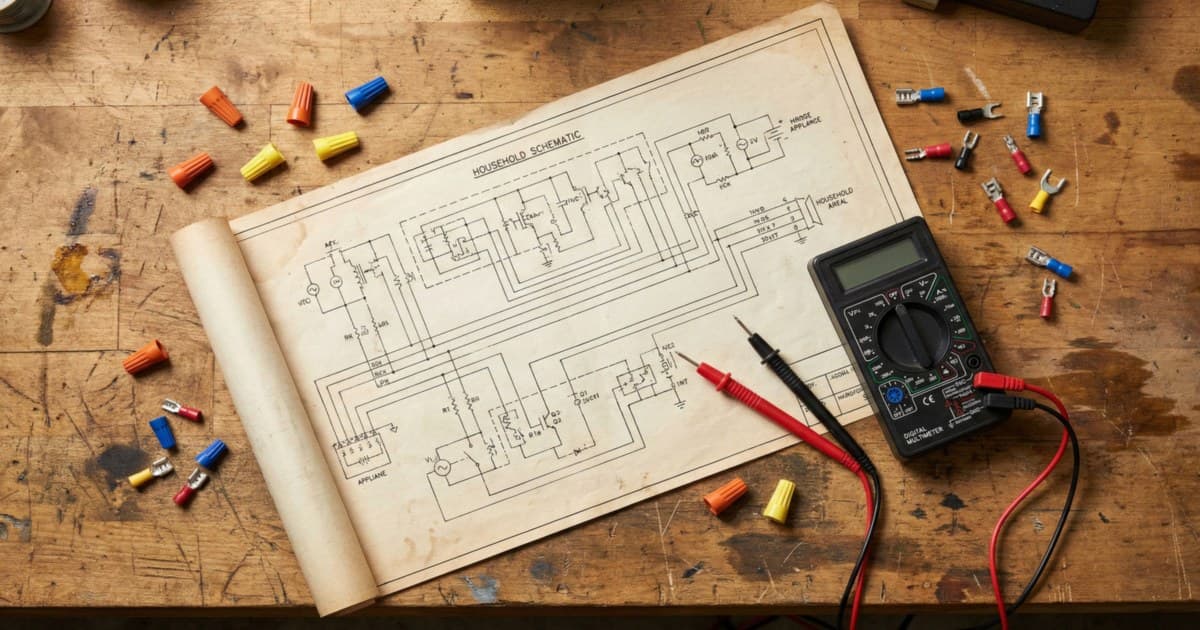
Before we get into symbols, understand what you're working with. Every residential appliance built in the last 30 years ships with a tech sheet — a laminated or paper document containing the wiring diagram, component location diagram, error code list, and sometimes a diagnostic sequence. It's the service manual in miniature form.
Where to find it:
- Front-load washer: taped inside the door frame, or behind the lower kick plate
- Top-load washer: inside the control console (pry the clips, hinge it up)
- Dryer: behind the control panel, or on the interior of the rear access panel
- Refrigerator: behind the kick plate, or inside the machine compartment
- Dishwasher: inside the door liner, along the top edge
- Range/oven: under the main top, or taped to the back panel
If the tech sheet is missing (stolen by a previous tech, lost, or disintegrated), search the full model number at appliancerepairhelp.com, RepairClinic, or the manufacturer's service portal. Most diagrams are available free.
Print it, mark it up. I work on a paper copy every time. Circle the circuit you're tracing. Mark test points with a pen. By the time a call is done, that paper looks like a battle map. That's fine. That's the point.
Common Schematic Symbols
You don't need to memorize every symbol before your first schematic. You need to recognize the ones that appear constantly:
Switches (open and closed):
- Normally open (NO): two terminals with a gap between them. Circuit is open by default, closes when actuated.
- Normally closed (NC): two terminals connected with a diagonal line. Circuit is closed by default, opens when actuated.
- Momentary switch: same symbol with an arrow indicating spring return.
Loads:
- Motor: circle with M inside, or three overlapping circles for three-phase
- Heating element / resistor: zig-zag line
- Solenoid coil: a rectangle or series of loops
- Lamp/LED: circle with an X inside
Protective devices:
- Fuse: rectangle
- Thermal fuse or thermal cutout: circle with a temperature rating marked
- Thermostat: switch symbol with a temperature indicator
Relays and contactors:
- Relay coil: rectangle labeled with relay designation (K1, K2, etc.)
- Relay contact (NO or NC): same switch symbol as above, labeled to match the coil
Power connections:
- L1, L2: Line 1 and Line 2 (the two 120V legs of a 240V circuit)
- N: Neutral
- GND or PE: Ground/Protective Earth
Component designations on appliance diagrams are not always consistent between manufacturers. Whirlpool uses a grid-reference system (A1, B3, etc.) to locate components on the diagram. Samsung and LG often use color-coded circuit paths that match wire harness colors. GE uses a combination of numbered test points and color codes. Within the first few minutes on an unfamiliar diagram, identify which convention is being used.
Understanding Ladder Diagrams
Most North American appliance manufacturers use a ladder diagram format. Here's why it's useful:
The diagram has two vertical rails — L1 (hot, left) and N (neutral, right) on 120V appliances, or L1 and L2 on 240V appliances. Every component circuit is a horizontal rung connecting these rails. To trace a circuit, you start at the left rail and follow the rung through every switch, sensor, and load until you reach the right rail.
What the ladder diagram shows you:
- Which switches must be closed (or open) for a circuit to activate
- What conditions are in series (all must be met) versus parallel (any one triggers the circuit)
- The logical state of every safety interlock in the system
Example — washer door latch circuit (simplified):
Imagine a rung that reads: L1 → Door Switch (NC when door open) → Control Board Input → N
This tells you: When the door is open, the door switch is in its normally-closed state (the switch opens when the door closes — confusing but standard). If the board never sees the door-closed signal, the machine won't spin. A tech who knows this traces the rung, tests the door switch, and confirms whether it's sending the correct signal. A tech who doesn't know this replaces the control board.
That's the difference.
Wire Harness Color Codes
Appliance wiring uses color codes that are partly standardized and partly brand-specific. Learning the conventions saves time during circuit tracing.
Near-universal color conventions in North American appliances:
- Black — L1 (hot leg 1)
- Red or blue — L2 (hot leg 2 on 240V) or second hot on some 120V circuits
- White — Neutral
- Green or bare — Ground
Brand-specific conventions:
- Whirlpool/Maytag: Uses colored stripe codes — a yellow wire with a black stripe is noted as "yellow/black" on the diagram. The base color is the wire, the stripe identifies the specific branch.
- Samsung/LG: Korean manufacturers use a similar stripe convention but with different base colors. Orange and gray wires appear more often in their harnesses.
- GE: Uses numbered test points at connector locations. Each connector has a label number (e.g., P3, J7) that matches the diagram. Color codes are present but the connector numbering is more reliable for GE diagnostics.
When color codes lie: Harness connectors that have been repaired or replaced by a previous tech may not follow the original color convention. Always verify continuity against the diagram rather than trusting a color that could have been substituted.
Tracing a Circuit: Step by Step
Here's a practical circuit trace for a common scenario: an electric dryer that runs but produces no heat.
-
Get the diagram. Pull the tech sheet from the back panel. Identify the heating circuit — look for the label "Heater" or "HE" or the schematic symbol for a resistance element.
-
Identify the circuit path. On a typical Whirlpool electric dryer, the heating circuit reads: L2 → High-Limit Thermostat → Thermal Fuse → Cycling Thermostat → Heating Element → L1. (The element connects across both legs of the 240V supply.)
-
Identify every series component. Every component in the path must be closed/continuous for the element to energize. List them: high-limit thermostat, thermal fuse, cycling thermostat, the element itself.
-
Test in order, starting with probability. The thermal fuse blows most often. Test it first. If it tests open — you found the problem. If it tests closed, move to the cycling thermostat. Then the high-limit. Then the element.
-
Confirm before you order. Don't order a part until you've metered the circuit and confirmed what's open. The diagram told you where to look. The meter confirms what the problem is.
One technique I use constantly: when I start on an unfamiliar schematic, I sketch the circuit I'm interested in on a separate piece of paper, simplified to just the components in that one circuit path. I'm not drawing the whole diagram — just the rung that contains the symptom. Simplifying the view makes it easier to see what's in series, what's in parallel, and where the test points are. It takes two minutes and saves twenty.
Using Test Points and Connector Diagrams
Many appliance tech sheets include a component location diagram alongside the schematic — a drawing of the machine with callouts showing where each component is physically located. Use both documents together.
The schematic tells you what to test. The component diagram tells you where to find the test point without disassembling more than necessary.
On washers and dryers, most manufacturers also include a connector pinout diagram — a table showing which pin in which connector corresponds to which circuit. When a wiring harness has 10 wires going into a board connector, the pinout tells you which wire to probe without guessing.
Error Codes and the Tech Sheet
On modern electronically-controlled appliances, error codes are your first diagnostic input, not your last. The tech sheet lists the error codes for the model and usually maps each code to a specific circuit or component to test.
When you see an error code:
- Look it up on the tech sheet
- The code points to a system or symptom — not necessarily a component
- Use the wiring diagram to find the circuit associated with that system
- Test the components in that circuit in order of probability
Error codes are the appliance telling you where to look. The schematic is the map. The meter confirms the diagnosis.
Common Diagnostic Mistakes Diagrams Prevent
- Replacing the control board when a switch is bad: The diagram shows that the board input is downstream of a door latch switch. Test the switch first. A $12 door latch has ended more than a few unnecessary $250 board purchases.
- Replacing a motor when a thermal overload is open: Thermal overloads on motors are sometimes external and on the schematic. If the motor circuit shows a TCO (thermal cutout) in series with the motor winding, test the TCO.
- Diagnosing backwards: Starting at the load and working back to the source. Always trace from the power source through the switches to the load. That's how the diagram is structured. Work with it.
Where do I find the wiring diagram for an appliance?▾
Start inside the unit — the tech sheet is usually taped behind a panel. On front-loaders, check the door frame or kick plate. On dryers, check the control console or rear panel. On refrigerators, check behind the kick plate. If missing, search the full model number at appliancerepairhelp.com or the manufacturer's service portal.
What is a ladder diagram and why do appliance schematics use them?▾
A ladder diagram has vertical power rails on left and right, with component circuits running horizontally as rungs. Appliance manufacturers use them because they show the logical state of every circuit at a glance — you can trace any circuit from power through every switch and load back to neutral in one line. They're built for diagnosis.
Do I need electronics knowledge to read appliance wiring diagrams?▾
No. Basic circuit tracing requires understanding continuity, voltage, and how switches (NO vs NC) behave in a circuit. You don't need analog or digital electronics theory. A multimeter, a diagram, and the knowledge of how to read a ladder rung from left to right is the skill set for the vast majority of appliance diagnosis.
Need a repair professional?
Get free quotes from verified technicians in your area.
Find a Pro Near You