
Control Board Diagnosis: When It's Really the Board (and When It Isn't)

Terry Okafor
Master refrigeration tech and NATE-certified instructor who moonlights as the magazine's advice columnist. His 'Ask Big Terry' mailbag has been settling shop disputes and diagnosing mystery leaks since 2011.
Control Board Diagnosis: When It's Really the Board (and When It Isn't)
Control board diagnosis is where the trade loses the most money, and I don't just mean the customer's money. Boards are the single most expensive part most of us stock, the easiest part to condemn without proof, and the part most likely to come back and bite you when the replacement shows the same symptom. I've reviewed warranty claims where the same machine got two boards in three weeks. The second board didn't fix it either. The drain pump harness did.
Here's the rule I teach every new tech: a control board is a decision-maker, not a magician. It reads inputs, follows its program, and switches outputs. If you can prove the board is getting good inputs and failing to deliver outputs, you've earned the right to condemn it. If you haven't proved that, you're guessing with a $400 part.
How to Diagnose a Control Board With a Meter
Every legitimate board diagnosis follows the same three checks. Power in, inputs in, outputs out. In that order.
Check 1: Supply power. Find the board's power input on the wiring diagram (if reading schematics isn't second nature yet, start with our field guide to reading electrical schematics). Verify line voltage at the board's input connector, not at the wall. A chafed harness or burned connector between the outlet and the board kills more boards on paper than in reality. On boards with an onboard transformer or switching supply, check the low-voltage rail too. Many tech sheets list expected DC test-point voltages, commonly 5V and 12V.
Check 2: Inputs. The board makes decisions based on what its sensors tell it. A thermistor that reads 50K ohms when it should read 11K at room temperature will make a perfectly healthy board refuse to run the compressor. Unplug the sensor connector at the board and measure resistance through the harness, then again at the sensor itself. Two readings, because the difference between them is the harness, and harnesses fail more often than boards do.
Check 3: Outputs. Put the machine in a state where the board should energize a load. Diagnostic mode is your friend here, since most service modes let you command individual outputs. Measure voltage at the board's output terminal for that load. Voltage present but the load doesn't run? The load or its wiring is bad, not the board. No voltage when the board is commanding the load? Now you have a board failure, witnessed and documented.
That third check is the one techs skip. Don't. It's the whole case.
Write your three readings on the invoice: supply voltage at the board, sensor resistance versus spec, and output voltage when commanded. It takes 30 seconds, it protects you when a customer questions a $450 repair, and it forces you to actually take the measurements instead of eyeballing the board and declaring it dead.
What Actually Fails on Boards
When boards do die, they die in predictable places. Pull the board, get it under good light, and inspect before you order anything.
Relay contacts. Relays switch inductive loads (motors, valves, heaters) thousands of times over the appliance's life, and every switching event arcs the contacts a little. Pitted contacts cause intermittent loads. Welded contacts cause loads that never shut off, which is why a refrigerator compressor that runs nonstop with the thermistor reading correctly is a board suspect. You can sometimes hear a failing relay chatter. On some boards, the relay is a replaceable component, and a $4 relay plus ten minutes with an iron beats a $380 board.
Scorched or cracked solder joints. Heat cycling fatigues solder, especially under heavy components like relays and high-current connectors. Look for a dull gray ring around a pin instead of a shiny fillet. Dryer boards and range boards are notorious because they live in hot environments. A cracked joint causes intermittent symptoms that come and go with vibration and temperature, the exact symptoms that drive parts-cannon diagnoses.
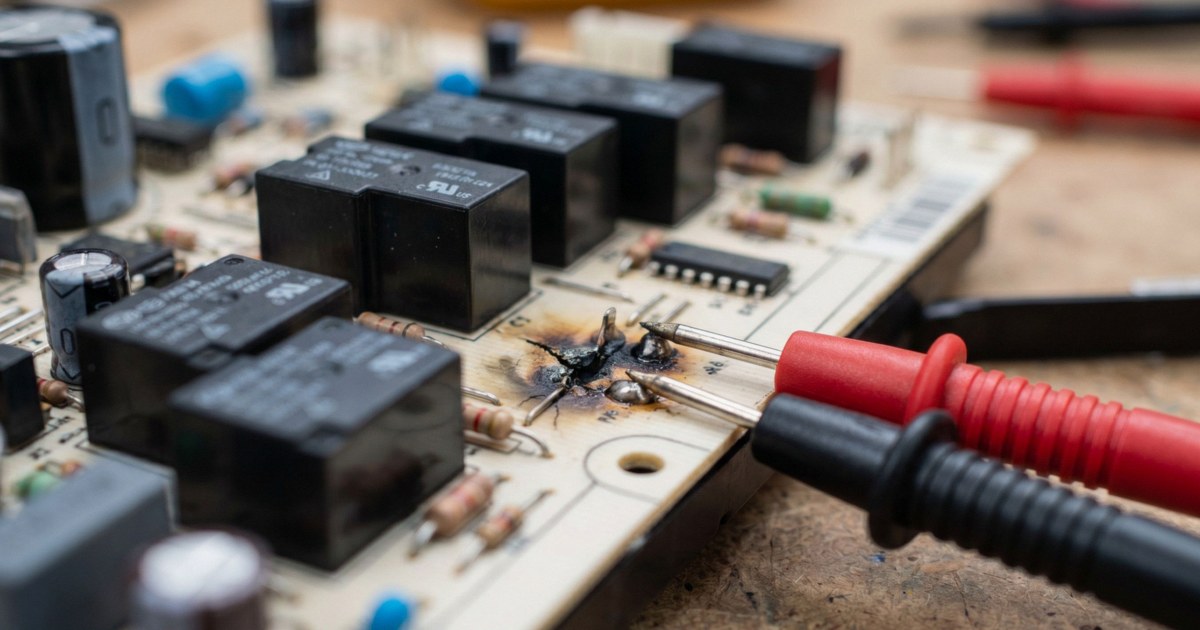
Blown MOVs. The metal oxide varistor sits across the incoming line and sacrifices itself during surges. A blown MOV looks charred, cracked, or simply vaporized, leaving a scorch shadow on the board. Sometimes the MOV takes the trace or a fuse with it and the board is otherwise fine. Sometimes the surge got past it. Either way, a blown MOV tells you a surge happened, which matters for the conversation you're about to have with the customer about power quality and surge protection.
Bad electrolytic capacitors. The power-supply section caps dry out with age and heat. Look for bulged tops, lifted seams, or brown leakage at the base. Failing caps cause low or sagging DC rails, which produce the weirdest symptom set in the trade: random reboots, dim displays, clicking relays, error codes that change run to run. If the 12V rail measures 9V, you've found your problem.
When the Board Is Innocent
Now the other half of the job, because in my experience well over half of "bad boards" aren't.
Sensor and harness faults wearing a board costume. The board can only report what it sees. An F10 runaway-temperature error on a Frigidaire range is a great example: the fault is frequently the oven temperature probe or its harness, not the EOC itself, and the resistance check settles it in two minutes. We walk through that exact diagnosis in our Frigidaire F10 error code guide. Same story with refrigerator thermistors, washer pressure sensors, and dryer thermal circuits. Measure the input before you blame the brain.
Bad grounds and floating neutrals. This one fools experienced techs. Modern boards reference their logic to neutral and ground, and a high-resistance neutral connection (corroded outlet, backstabbed receptacle, loose lug in the panel) lets the board's reference voltage wander. Symptoms include phantom error codes, displays that scramble when the heater kicks on, and machines that reset mid-cycle. Before condemning any board with flaky symptoms, measure hot-to-neutral, hot-to-ground, and neutral-to-ground at the receptacle, ideally under load. Neutral-to-ground above 2-3 volts under load means the problem may live in the building's wiring, not the appliance. I've watched a "bad board" get fixed by tightening one screw in a 40-year-old receptacle.
Voltage drop under load. A 240V dryer reading 242V open-circuit can sag below 200V when the heater energizes if there's resistance in the circuit. The board browns out, resets, and throws a code. Loaded voltage readings catch this; open-circuit readings never will. Our advanced multimeter techniques guide covers loaded testing and voltage-drop measurement in detail.
User interface boards taking the fall. Many machines split control between a main board and a UI/display board, talking over a serial bus. A dead display with a running machine usually means UI board or the cable between them. Don't replace the main board for a display symptom until you've checked communication and the ribbon connections.
Repair vs. Replace: The Economics
Once you've genuinely condemned a board, you have three options, and the right one depends on availability, warranty, and how long the customer can wait.
New OEM is the default for in-warranty work and for customers who need the machine back today. Rebuild services shine in two situations: discontinued boards (common on 10-15 year old units where the board is NLA) and expensive boards on premium brands, where a $200 rebuild against a $700 OEM part changes the repair-versus-replace conversation entirely. Typical turnaround runs 3-10 business days, so the customer lives without the appliance in the meantime, or you swap in a loaner board if you've built that kind of inventory.
Component-level repair in your own shop is the high-margin play if someone on your bench can solder. Relays, MOVs, and electrolytic caps cover most repairable failures. Know your limits, though. Cracked multilayer boards, fried microprocessors, and water-damaged boards with corroded vias aren't worth your bench time.
When a board dies from surge damage (blown MOV, charred line section), quote a whole-house surge protector or at least a point-of-use protector with the repair. You're not upselling; you're treating the cause instead of the symptom. The same surge event that killed this board took a few months off every other board in the house.
Reading Surge Damage Patterns
Surge kills tell a story if you look. Damage clustered at the line input (MOV, input fuse, bridge rectifier) means the surge came in on the power line, and a whole-house protector is the fix. Damage at a sensor input or communication port with the power section clean suggests the surge came in through a different path, often a lightning-induced spike on a water line or an interconnect cable. Multiple appliances dying the same week is a power-quality event, and it's worth asking the customer about recent outages, electrical work, or that one storm. Utilities have paid claims for damage from dropped neutrals on their side of the meter, but only when somebody documented it.
The Discipline Pays for Itself
A board you replace without proof is a coin flip you're betting $400 on, and when the coin lands wrong you're back in that kitchen explaining why the new board didn't fix it. The three-check sequence (power in, inputs in, outputs out) takes 15 minutes with the tech sheet in hand. Across a year of calls, that habit is worth thousands in avoided comebacks, and a reputation as the tech who gets it right the first time.
That reputation is the real asset. Boards are just parts.
Need a repair professional?
Get free quotes from verified technicians in your area.
Find a Pro Near You