
How Minor Appliance Problems Become Major Repair Bills: Four Documented Cases

Maria Solano
Former appliance warranty claims adjuster turned investigative repair journalist. Maria's 'What Went Wrong' teardown series has made her the most feared woman in the white-goods industry.
How Minor Appliance Problems Become Major Repair Bills: Four Documented Cases
As a warranty claims adjuster, I spent five years evaluating appliance failure claims and calculating what they cost. The number that never stopped surprising me was how often the appliance damage itself was the smaller line item on the invoice. The bigger number was usually whatever the appliance broke on the way out — the floor, the cabinet, the surrounding structure, or the second appliance that got taken down with it.
Here are four real failure patterns I've seen, with honest numbers and the warning signs that could have caught each one early.
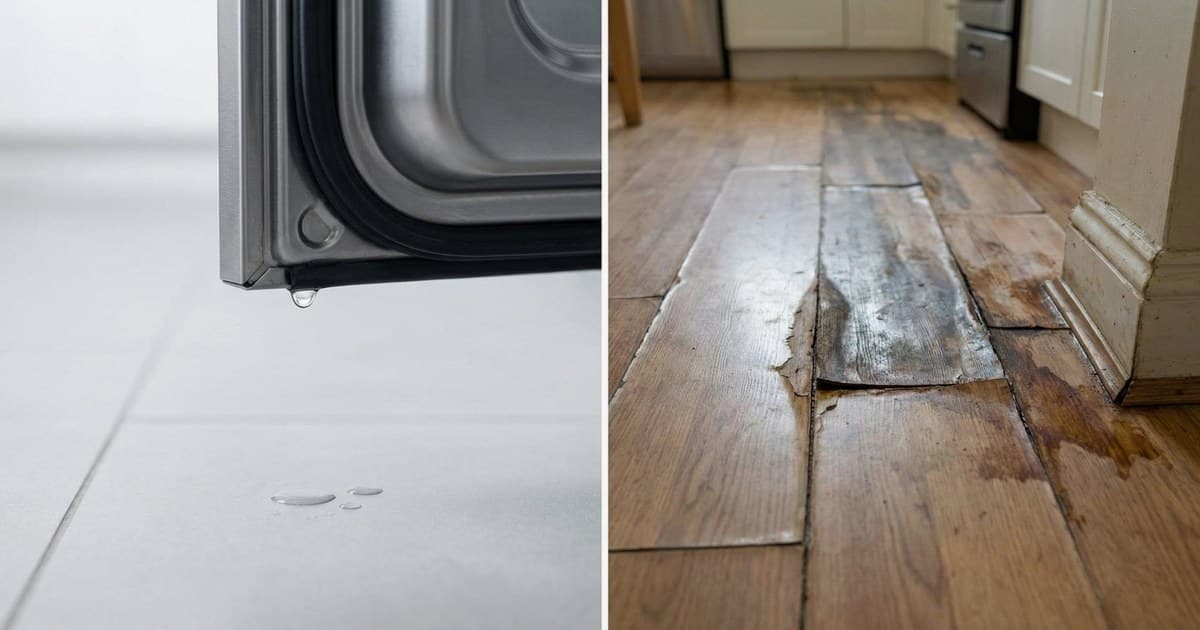
Case 1: The Dishwasher That Rotted the Subfloor
A slow leak under a dishwasher is one of the easiest problems to miss because the water goes under the machine, under the floor covering, and into the subfloor where it's invisible. By the time the homeowner notices soft spots in the floor or a musty smell in the kitchen, the damage is already significant.
The early repair: A leaking door gasket or inlet valve on a Bosch or KitchenAid dishwasher. Parts run $20-50, labor $150-200, total $175-250. The symptom at this stage: a small puddle under the front of the dishwasher after a wash cycle, or damp under the kick plate.
After 3-6 months of ignored leaking: The leak reaches the subfloor. In a California coastal home with concrete slab, there's less structural damage risk. In a home with a wood subfloor — common in San Diego's older neighborhoods and in San Fernando Valley tract homes from the 1970s — 6 months of moisture contact causes visible delamination of OSB subfloor and sometimes reaches the floor joists.
The delayed repair cost:
- Dishwasher repair: $200-300
- Subfloor replacement (3-5 sq ft area): $400-800
- Flooring reinstallation (tile or vinyl matching): $300-700
- Total: $900-1,800
The warning signs you can't ignore:
- Water under the machine after a wash cycle, even a tablespoon
- Soft or springy feeling in the floor in front of the dishwasher
- Musty smell in the kitchen with no obvious source
- Warping or lifting of flooring material near the appliance
If you're not sure whether your dishwasher is leaking, put a dry paper towel under the front of the machine before a wash cycle and check it after. Even a small leak will show up on the towel. This takes 30 seconds and can save you a four-figure floor repair.
Case 2: The Noisy Drum Bearing That Destroyed the Dryer
A failing drum bearing is the most common "slow escalation" failure in dryers. The drum sits on a rear bearing (a ball bearing or sleeve bearing, depending on design) and spins on it thousands of times a day. When the bearing begins to fail, it makes a rumbling or squealing sound — which most homeowners live with for months because the dryer still works.
The early repair: Drum bearing replacement on a Whirlpool, Maytag, or Samsung dryer. Parts run $15-35 (bearing kit), labor $125-175, total $150-225. The symptom: a rhythmic squealing or metallic grinding that starts when the drum gets hot.
After 6-12 months of continued use: The bearing seizes. The drum stops rotating smoothly and instead rocks on the failing support. The felt drum seal — which was fine at first — gets abraded by the uneven movement. The drum itself develops flat spots or scoring at the bearing contact point. The plastic bulkhead that supports the rear of the drum can crack from the lateral load.
The delayed repair cost:
- Drum bearing: $20-35
- Drum seal (abraded by uneven wear): $15-25
- Rear bulkhead (cracked by load): $30-60
- Control board or wiring (sometimes damaged by vibration): $150-250 (if affected)
- Labor for all of the above: $250-350
- Total: $450-720 vs. the original $150-225
In some cases, the drum itself develops scoring deep enough that the unit is not economically worth repairing, and the bearing failure results in a full replacement.
The warning signs:
- Squealing or grinding sound that gets louder when the dryer is hot
- Drum wobble visible through the door
- Clothes coming out with grease spots or streaks (bearing grease migrating to drum interior)
Case 3: The Dirty Refrigerator Condenser That Killed the Compressor
This one is purely a maintenance failure, and it's tragically common. Refrigerator condenser coils — the heat rejection component underneath or behind the unit — need to be cleaned every 6-12 months in homes with pets. When they're coated in dust and pet hair, the refrigerant running through them can't reject heat efficiently. The compressor runs hotter and longer to compensate.
The early maintenance: Cleaning the condenser coils. Cost: zero for a DIY clean (coil brush, $12) or $75-125 if a tech does it during a service visit.
After 1-3 years of neglected coils: The compressor runs in elevated thermal conditions continuously. Compressor windings heat cycle beyond design limits, the oil ages faster, and internal mechanical wear accelerates. The compressor fails — either a stuck winding or mechanical seizure — and the refrigerator stops cooling.
The delayed repair cost:
- Compressor replacement: $300-600 for parts
- Labor (sealed system work, recovery, evacuation, recharge): $250-400
- Total sealed system repair: $550-1,000
- Replacement refrigerator (if repair isn't economical): $800-2,500
The same compressor that ran hot for two years might have lasted another eight if the coils had been cleaned annually. It's not guaranteed — compressors do fail for other reasons — but dirty condenser coils are a documented accelerant.
The warning signs:
- Refrigerator running more frequently or continuously (longer on-cycles)
- Food spoiling faster than normal
- Warm coils at the bottom front of the unit (they should be warm, not hot)
- Visible dust coating on the coils when you pull the kick plate
Case 4: The Washing Machine That Flooded the Laundry Room
Washing machine supply hoses — especially the older braided rubber type — have a failure rate that spikes after age 5-7 years. A fully-burst supply hose on a top-load washer delivers 5-8 gallons per minute into the laundry room. Most homeowners aren't home when it happens, and the hose can run for hours.
This isn't strictly an "ignored repair" in the traditional sense — there often aren't visible warning signs before burst failure. But there is a preventive maintenance action: hose replacement. And there is one warning sign: small seeps or mineral buildup at the hose connection point, which indicates the hose fitting is deteriorating.
The preventive maintenance: Braided stainless steel supply hoses cost $15-25 for a pair (hot and cold). Replacing them is a widely recommended interval (rubber hoses every 3-5 years, braided stainless every 5-6 years). A plumber or appliance tech can replace them in under 20 minutes.
After a hose failure during an 8-hour absence: Water damage to flooring, walls, adjacent rooms, and the units in the apartment below (if applicable). In the warranty claims world, washing machine supply hose failures average roughly $5,000 to $10,000 in property damage, though a catastrophic multi-floor failure can run into the tens of thousands, depending on how long the water ran and what floor materials it reached.
The warning signs to act on immediately:
- Any visible seeping or weeping at hose connections
- Mineral crust buildup around the hose ends
- Cracks or bubbling in the hose surface
- The hose is more than 7 years old (replace regardless of appearance)
The Pattern Across All Four Cases
Every one of these failures shares the same structure: a small symptom with a cheap fix that, when ignored, enables secondary damage far more expensive than the original repair.
The common thread is that appliance problems rarely stabilize. A small leak gets bigger. A noisy bearing gets seized. A dirty coil runs the compressor harder every cycle. The appliance is signaling its distress from the beginning — the question is whether you choose to act at the $150 stage or the $900 stage.
When evaluating whether to repair or replace an appliance, see our appliance repair vs. replace guide for a full framework that accounts for age, repair cost, and expected remaining life.
When does it make sense to delay an appliance repair?▾
Rarely. Most appliance symptoms — leaks, new noises, reduced performance — indicate an active problem that is getting worse. The only time delay makes sense is if the appliance is at the end of its useful life and replacement is already planned. If it leaks, makes new sounds, or is obviously underperforming, address it before the secondary damage arrives.
How much more expensive does an appliance repair get if I wait?▾
Significantly. A leaking dishwasher can turn a $200 repair into $1,800 in floor and cabinet damage within months. A noisy dryer bearing doubles or triples the repair cost as secondary components wear. A refrigerator with dirty condenser coils can kill the compressor over 1-3 years — turning a free cleaning into a $550-1,000 sealed system repair.
Sources
- Insurance Institute for Business & Home Safety (IBHS), washing-machine supply-hose failure study.
- State Farm. "A $30M Load of Laundry." statefarm.com
Need a repair professional?
Get free quotes from verified technicians in your area.
Find a Pro Near You