
How to Level a Washing Machine: Diagnosing and Fixing Vibration Problems

Maria Solano
Former appliance warranty claims adjuster turned investigative repair journalist. Maria's 'What Went Wrong' teardown series has made her the most feared woman in the white-goods industry.
How to Level a Washing Machine: Diagnosing and Fixing Vibration Problems
A washing machine that walks across the floor or shakes violently during spin is one of those problems that looks minor and isn't. An out-of-level machine puts uneven stress on the drum bearings and shock absorbers. It tugs on the fill hoses and drain hose every cycle. Left alone long enough, it turns a $40 leveling adjustment into a $400 bearing job.
The good news is that most shaking and walking has a simple mechanical cause and a simple fix. The bad news is that some shaking is telling you about a real problem inside the machine — and knowing the difference is what this guide is about.
Why Washing Machines Walk and Shake
There are three categories of washing machine vibration, and they feel similar but have completely different causes.
Category 1: Out of level. The machine rocks because one or more of its adjustable feet aren't contacting the floor firmly. During spin, the imbalance amplifies and the machine moves. This accounts for the majority of vibration complaints on machines under five years old.
Category 2: Installation surface problems. The machine is level, but the floor is soft, springy, or slippery. Hardwood and laminate over a joist span will flex under a spinning drum. Tile and vinyl can be slippery enough that even a well-leveled machine slides. This is an environment problem, not a machine problem.
Category 3: Mechanical failure. Worn shock absorbers, failed drum bearings, a cracked spider arm, or a drum out of balance due to a stuck foreign object. These produce shaking that gets worse over time, often accompanied by grinding or thumping sounds. Leveling won't fix them.
Start by ruling out the first two before you conclude there's a mechanical problem.
What You Need
- A carpenter's bubble level (a 24" or longer level is ideal — small torpedo levels work but are less accurate)
- A 1/2" or adjustable wrench, or pliers for older machines
- Help from another person if the machine is heavy (most front-loaders are 150-200 lbs)
- Anti-vibration pads (optional but recommended for hard floors)
Before you start, pull the machine away from the wall and check the drain hose and fill hoses. Hoses pinched against the wall during installation create a constant tension that can affect how the machine sits. While you're back there, check that the shipping bolts were removed when the machine was installed. Front-load washers ship with steel rods bolting the drum to the cabinet. If they're still in, you'll get violent vibration and potential drum damage on every spin cycle. I've seen this more than once on machines that customers installed themselves.
Step 1: Check the Current Level
Place your bubble level on top of the machine, oriented front-to-back. Note which direction the bubble drifts. Then rotate the level 90 degrees and check side-to-side.
A perfectly level machine will have the bubble centered in both orientations. Most machines need adjustment in at least one direction. You're aiming for level, not just "close" — the machine's own internal balancing systems work best when the cabinet is plumb.
Also rock the machine by hand. Grab the top corners and push diagonally. A properly leveled machine on firm floor should have almost no movement. If it rocks noticeably, one foot isn't contacting the floor.
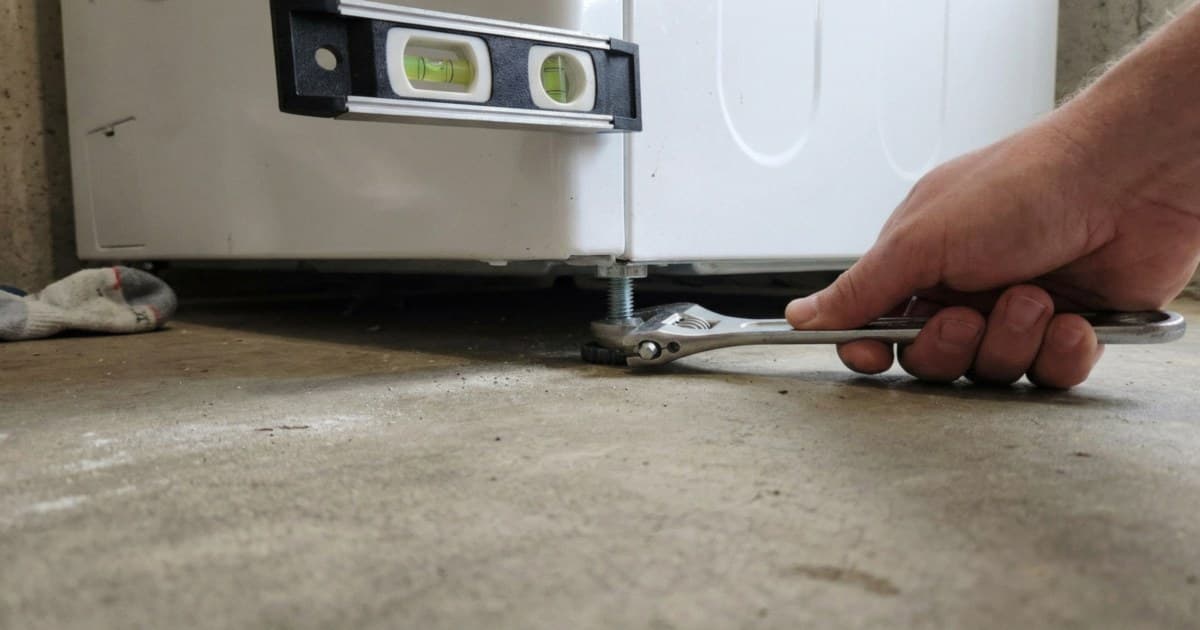
Step 2: Adjust the Leveling Feet
All washing machines have adjustable threaded feet at each corner, and most have a locking ring above the foot that holds the adjustment. The feet thread in and out of the machine's base.
To raise a corner: Turn the foot counterclockwise (looking from underneath). This extends the foot downward, raising that corner.
To lower a corner: Turn the foot clockwise. This retracts it.
The procedure:
- Pull the machine far enough away from the wall to access all four feet. You don't need complete clearance — 18 inches is usually enough.
- Loosen the locking ring on each foot by hand or with pliers. Spin it up toward the machine cabinet.
- Adjust the front two feet first. Level the machine front-to-back with the bubble level centered.
- Check side-to-side level. Adjust the left or right front foot to correct.
- With the front level, move to the rear feet.
Many top-load washers — Whirlpool, Maytag, GE — have self-adjusting rear feet. Once you set the front feet and set the machine down, tilting the front up about an inch and then setting it back down will cause the rear feet to self-level. The weight of the machine sets them. Check with the level after you do it. If the rear feet on your machine adjust manually, use the same wrench technique as the front.
- Check the level in both directions again. Make small adjustments — a half-turn of the foot is typically about 1/8 inch of height change.
- Rock the machine by hand. All four corners should feel solid, with no movement.
Step 3: Lock the Feet
This step gets skipped constantly, and it's why machines go out of level after a few weeks of use.
Each leveling foot has a locking ring — a nut that tightens up against the bottom of the machine cabinet, jamming the foot in place. Once you have the machine level and all four feet firm to the floor, tighten every locking ring snug against the cabinet.
Use pliers or a wrench. Hand-tight is not tight enough. The vibration from a spin cycle will walk the feet loose within days if the rings aren't cinched down.
Step 4: Anti-Vibration Pads (When and Why)
Anti-vibration pads go under the feet after leveling is confirmed. They're rubber or composite pads — either four individual pads (one per foot) or a full-platform mat. They do two things: reduce vibration transmission to the floor, and keep the feet from sliding on smooth surfaces.
They're most valuable on:
- Hardwood and engineered wood floors (protect the surface, reduce noise transmission to the room below)
- Tile and vinyl (prevent sliding)
- Second-floor installations (reduce vibration felt in the floor system)
They are not a substitute for leveling. If you put pads under an out-of-level machine, you'll have a slightly quieter out-of-level machine that still walks.
When Leveling Doesn't Fix It: Mechanical Causes of Washing Machine Vibration
If you've leveled the machine, locked the feet, added pads, and it still vibrates hard enough to walk across the room — the machine has a mechanical problem.
Worn Shock Absorbers or Dampers
Front-load washers use two to four shock absorbers that connect the outer tub to the cabinet. Top-loaders use similar damper pads or rods. When they wear out, the tub has nothing to control its movement during spin. The whole cabinet shakes.
Test: open the door on a front-loader and push the drum up and down manually. It should move with firm, dampened resistance. If it bounces freely or you feel or hear a clunk, the shocks are gone.
Front-load shock absorbers run $20-50 for the parts. Labor is 1-2 hours depending on access.
Drum Bearings
Worn drum bearings produce a deep grinding or rumbling sound during spin that gets louder as the cycle speeds up. The machine may also vibrate in a different pattern — not a rhythmic shake but a sustained roar.
To test: reach into the drum, grab the back of it, and try to wobble it vertically. More than 1/4 inch of play means the bearings are gone. On many front-loaders, the bearing is integrated into the outer drum tub, and bearing replacement means replacing the entire tub assembly — a $300-600 repair on parts alone. See our guide on washing machine not spinning for when bearing failure progresses to complete loss of spin.
Unbalanced Load (User Error)
A single heavy item — one wet bath towel, a single comforter — can create an imbalance that no leveling will overcome. The drum spins with the load clumped to one side. The machine will bang and shake on every spin cycle.
Redistribute the load. Add a second towel to balance. Use the load size setting that matches the actual load.
The Spider Arm
On front-load washers, the spider arm is the three-pronged metal bracket that connects the rear of the drum to the rear bearing shaft. It's made of aluminum and is a known weak point on LG and some Samsung front-loaders. When it cracks or fractures, the drum drops slightly to one side and causes severe banging and vibration.
If you hear a rhythmic thump-thump-thump during spin and the drum wobbles when you push it, get a look at the spider arm before ordering bearing kits.
Quick Diagnostic Chart
| Symptom | Most Likely Cause |
|---|---|
| Machine rocks/walks, makes noise on spin | Out of level — check feet first |
| Loud banging during spin | Unbalanced load or failed shocks |
| Rumbling/grinding noise, worse at high speed | Drum bearings |
| Rhythmic thumping, drum visibly off-center | Spider arm failure |
| Vibration worse after moving the machine | Feet need re-leveling, locking rings need tightening |
| Severe shaking on brand-new front-loader | Shipping bolts still installed |
Leveling a washing machine is a 20-minute job with basic tools. If you've done it correctly and the machine still shakes, you've actually done yourself a favor — you've isolated the problem to a mechanical cause, and now you know what to price out.
Why does my washing machine walk across the floor?▾
Walking is almost always caused by uneven leveling feet. When one corner is lower than the others, the machine rocks during spin and inches itself forward. Loosen the locking rings, adjust until all four corners are firm to the floor and the machine is level in both directions, then lock the rings tight.
My washer is level but still vibrates badly. What's wrong?▾
A level machine that vibrates severely usually has a mechanical cause — worn shock absorbers, failed drum bearings, or a cracked spider arm. These require a service call. See our guide on washing machine not spinning for the full mechanical diagnostic.
Do anti-vibration pads actually work?▾
Yes, for noise and vibration transmission to the floor. They reduce how much vibration gets into hardwood, tile, and floor joists. What they don't do is fix an out-of-level machine or worn mechanical components — those need to be addressed directly.
Can I put a washing machine on an uneven floor?▾
Yes. The adjustable feet exist precisely for this situation. Extend the feet on the low side until the machine is level and all four corners are solid. Anti-vibration pads help prevent sliding on smooth surfaces like tile or vinyl.
Need a repair professional?
Get free quotes from verified technicians in your area.
Find a Pro Near You