
Fix a Leaking Refrigerator: 5 Common Causes With DIY Difficulty Ratings

Maria Solano
Former appliance warranty claims adjuster turned investigative repair journalist. Maria's 'What Went Wrong' teardown series has made her the most feared woman in the white-goods industry.
Fix a Leaking Refrigerator: 5 Common Causes With DIY Difficulty Ratings
A refrigerator that leaks water is frustrating but usually fixable without a service call. Most of the causes are mechanical — not sealed system issues — and at least four of the five are accessible to a homeowner with basic tools. I'll rate each one by difficulty (Easy/Moderate/Call a Tech) so you know what you're walking into before you start.
Cause 1: Clogged Defrost Drain
Difficulty: Easy | Typical cost: $0-30
In my experience this is the most common refrigerator leak. Most refrigerators that leak water inside the fresh food compartment — pools under the produce drawers, ice crystals in the back of the bottom shelf — has a clogged defrost drain.
How it works: Modern frost-free refrigerators run an automatic defrost cycle periodically (typically anywhere from a few times a day to once a day, depending on the model and how often the doors are opened). The defrost heater melts accumulated frost on the evaporator coil. That meltwater is supposed to flow down a drain channel, through a rubber drain tube, and into a drain pan beneath the compressor at the bottom of the unit, where the compressor heat evaporates it. When food debris, ice, or mineral buildup blocks the drain channel or tube, the water backs up and overflows into the fridge.
How to fix it:
- Empty the freezer and remove the back wall panel (usually 4-6 screws).
- You'll find the evaporator coil and below it, a plastic drain channel.
- Look for ice buildup in the channel or debris in the drain hole. A blocked drain hole often has a small ice plug.
- Pour warm (not boiling) water into the drain hole to melt the ice. A turkey baster works well.
- Follow with a cup of warm water mixed with a tablespoon of baking soda — this helps clear residual debris and discourages regrowth.
- If the rubber drain tube at the bottom of the drain channel is accessible, clear it with a straightened wire or a drain snake.
- Reassemble and monitor.
Prevent recurrence: A piece of foam pipe insulation around the drain tube where it passes through the freezer floor helps prevent refreezing. Some techs also drop a small aquarium tablet into the drain channel annually to prevent algae and debris buildup.
Cause 2: Cracked or Overflowing Drain Pan
Difficulty: Easy | Typical cost: $15-50 (if pan needs replacement)
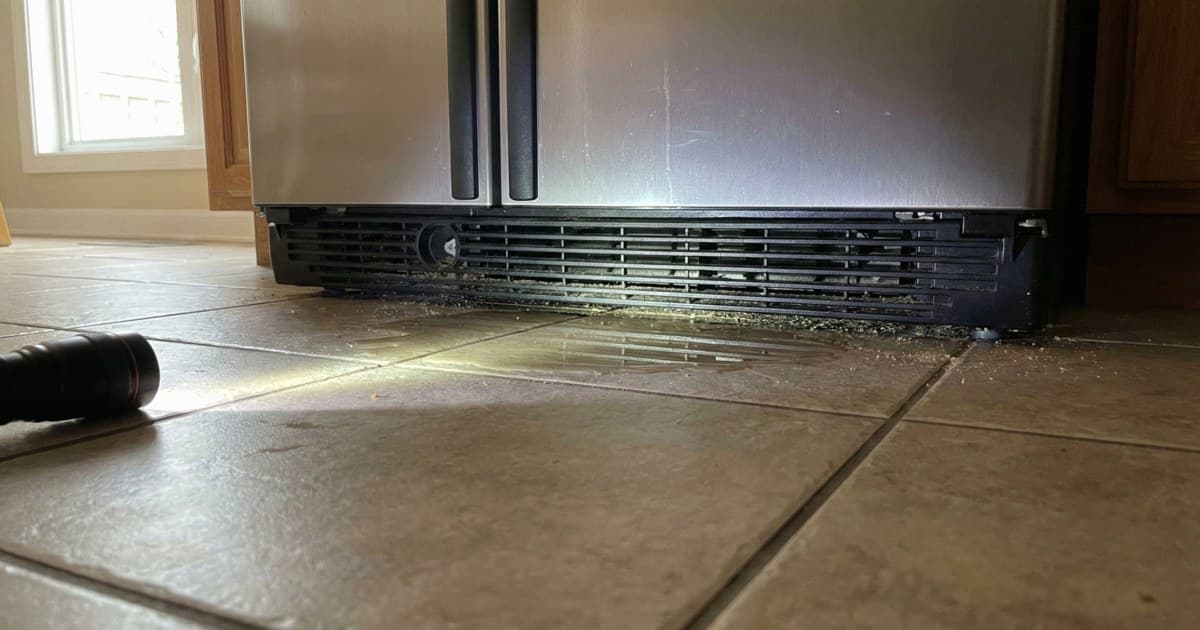
The drain pan sits under the refrigerator, beneath the compressor. It collects the defrost meltwater from the drain tube and the compressor heat evaporates it. If the pan is cracked, water leaks onto the floor. If the pan is overwhelmed (which happens in very humid conditions or if the defrost cycle is running more than normal), it overflows.
How to check it: Pull the refrigerator out from the wall. The drain pan is usually accessible from the front-bottom (behind the kick plate) or the back-bottom. Slide it out carefully — it may have water in it.
Look for cracks, chips, or sediment buildup. A cracked pan needs replacement. An overflowing pan without cracks is usually a symptom of another problem (excessive defrost cycles, refrigerator running continuously due to a cooling issue).
Replacement: Drain pans are model-specific but inexpensive — typically $15-40. Search your full model number (on the inside wall of the refrigerator) to find the right part.
If you're noticing the refrigerator is running constantly alongside this leak, read our refrigerator not cooling guide — an underlying cooling problem may be driving excessive defrost cycles.
Cause 3: Faulty Water Inlet Valve
Difficulty: Moderate | Typical cost: $35-90 for the valve, $125-225 with labor
If your refrigerator has an ice maker or water dispenser, there's a water inlet valve at the back of the unit where the household water supply connects. This valve is an electrically-actuated solenoid that opens when ice or water is requested. When the valve fails — or when the valve body cracks from freezing — it leaks.
How to identify a valve leak:
- Water on the floor directly behind the refrigerator, near the water line connection
- Slow drip that appears even when ice and water aren't being actively dispensed
- Ice maker that overflows its tray (overfill is a valve that doesn't fully close)
How to test the valve:
- Pull the refrigerator out and locate the inlet valve at the back, near the water line entry
- Check the valve body for cracks or mineral deposits (calcium buildup indicates long-term slow leaking)
- Check the water line connections at the valve — compression fittings can work loose over time
- Check the solenoid coil with a multimeter — a failed coil (open circuit) means the valve won't open or close properly
Repair or replace? Water inlet valves fail more often than they're repaired. A replacement valve costs $35-75 depending on brand, and the installation is a 30-minute job: disconnect the water supply, disconnect the wiring harness, remove two screws, swap the valve, reconnect. Shut off the water supply line before starting.
Cause 4: Damaged Water Filter Housing
Difficulty: Easy to Moderate | Typical cost: $0-60
If your refrigerator has an internal water filter (usually inside the refrigerator compartment, either in the top right corner or in the bottom grille), a cracked filter housing or an incorrectly installed filter can leak water inside the refrigerator.
How to check it:
- Remove the water filter — twist a quarter-turn counterclockwise on most models
- Inspect the filter housing port for cracks
- Install a new filter (or a bypass plug if you don't use the filter) and check that it seats and locks completely
- Run a few cups of water through the dispenser and check for leaks at the filter seat
The most common scenario here is an incompatible or incorrectly seated third-party filter. The housing seal requires the filter to be seated and rotated to the locked position — if it's slightly off, it drips. Try rotating it again, firmly, until you feel the stop.
A cracked filter housing is less common but does occur, especially on units where the filter has been frozen during a power outage or owner-initiated deep freeze. Replacement housings cost $25-60 and require some disassembly to access.
Third-party refrigerator water filters are a major source of filter housing leaks. The OEM filters are machined to tight tolerances to seal the housing correctly. Aftermarket filters vary in quality. If you're seeing a leak at the filter after swapping to a third-party brand, try the OEM filter before replacing the housing.
Cause 5: Loose or Damaged Water Supply Line
Difficulty: Easy | Typical cost: $10-25
The water supply line connects the household water shutoff valve to the back of the refrigerator. In most homes, this is either a 1/4-inch copper tube or a braided stainless steel line with compression or push-to-connect fittings.
Common failure points:
- Compression fitting that worked loose when the refrigerator was moved
- Plastic supply line (common on older installs) that cracked or kinked
- Push-to-connect fitting that wasn't fully seated
How to fix it:
- Shut off the water supply valve behind the refrigerator (or under the sink if the line comes from there)
- Inspect the line from the wall to the refrigerator — look for drips, discoloration, kinks, or visible damage
- For a loose compression fitting: hand-tighten, then a quarter-turn with pliers. Don't over-tighten — brass compression fittings crack if overtorqued
- For a plastic line: replace it with a braided stainless line. They're $10-20 at any hardware store and far more durable
The entire water supply line swap takes 15 minutes and eliminates the most-ignored source of slow refrigerator leaks.
When to Call a Tech
These five causes cover the vast majority of refrigerator leaks. Call a professional if:
- You suspect a refrigerant leak (sweet or chemical smell, cooling problems alongside the leak — see the refrigerator not cooling guide for those symptoms)
- The defrost drain is blocked by a failed defrost heater or thermostat (you clear the drain and it refreezes within a week — the root cause is a defrost system failure requiring component testing)
- The ice maker itself is damaged or overfilling (this requires ice maker assembly diagnosis beyond what a simple valve swap covers)
Why is my refrigerator leaking water inside at the bottom?▾
Water inside the refrigerator — in the crisper drawers or at the bottom shelf — almost always means a clogged defrost drain. The meltwater from the automatic defrost cycle is backing up instead of draining through the tube. Clear the drain channel and tube with warm water and a baster.
Is a leaking refrigerator dangerous?▾
A water leak from the defrost drain or supply lines is not immediately dangerous, but it can damage flooring and create mold conditions under the unit over time. Don't ignore it. A sweet or chemical smell with a leak is a different situation — that may indicate a refrigerant leak. Shut off the unit and call a tech.
How do I find where my refrigerator is leaking from?▾
Dry everything thoroughly, then check after the next defrost cycle (most units run one within a day or so). If water appears inside after defrost, it's the drain. If it's constant on the floor at the back, it's the supply line or inlet valve. If it's at the filter location, it's the filter or housing. Use the location and timing of the water to narrow it down before you start disassembling.
Need a repair professional?
Get free quotes from verified technicians in your area.
Find a Pro Near You